Saturday, January 30, 2010

BUTTERFLIES INC. Felt Flower Tutorial


Start out by cutting 2 of the felt in flower shape. Then cut out 1 batting in smaller shape.

Sew all three pieces together

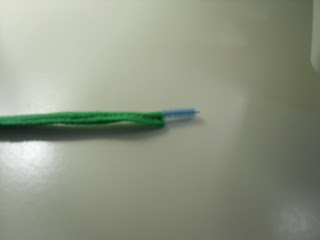
For the Stem use pipe cleaner and green felt

Sew stem at the base of the flower. Back stitch acouple of time to make it secure.

Tadah!! The beautiful flower!


Here is how I made the Flowers for the Felt house step by step. I hope your little ones are enjoying there felt playhouses. All three of my kiddos are loving the felt playhouse. They take off the food from the garden and pretend to make dinner and all sorts of other funny things. I am so glad I had made this, this was the best
$30 I have ever spent and honestly it only took me 4 or so interupted hours (mind you) to make the playhouse.


To come.... Vintage skirt, Anthropologie inspired necklace.

Thursday, January 28, 2010

BUTTERFLIES INC. Little Saucer Chair Makeover


Sorry, didn't get a pic of the chair before I started to take it over, but you get the idea. Cut it at the seams

Naked chair (aka frame)

Lay the padding/(old chair seat) on desired new fabric and batting, cut around old chair seat.

After you have sewn the new chair together by lining up sides, you need to be able to connect the chair to the frame. You can make a rectangle about 4" wide and your desired length. Fold in half and sew. Turn outside right. You will need 8 total. Then sew on one side for buttons one side for button holes. Or you can use velcro.

And there you have it a cute new seat that you can take off and wash when your little one spills RED juice all over it.
My sweet neighbor gave my little daughter this cute chair, well, juice got to it and well, you can not wash it, so I made a new cover. So, the next time you are garage saling it or at your local thrift store, and think that is a cute chair, but hello nasty cushion. Make a new one! Happy sewing!
PS my inspiration came from one of my favorite sites http://makeitandloveit.blogspot.com/2009/11/recovering-kids-saucer-chair.html
Thanks so much Ashley!

Tuesday, January 26, 2010

Update! on ORGANIZATION DVD CHAOS

YEAH! It is totally working. I know it has not been that long since I posted the now organized DVD mess. Let me just tell you, that all those dvds are still in the folders where they belong. Yeah me! One organization down and mastered, millions more to go. Have a great day!

ORGANIZATION..30 meals for 30 days


Tired of looking at recipes that are all over the place and not sure what you have in the fridge or cubbard... Turn those pages that are all written, spilled milked on, chewed on, to these cute recipe cards below.

here is where I got the template for the cards and it was free http://www.messyvegetariancook.com/2008/02/14/free-recipe-card-templates-floral-pop-printable-recipe-cards/#more-51

Recipe Box, it has magnets Modge Podge on the back of them. I modge podged the whole box with scrapbook paper and stickers. (my first attempt to Modge Podge, and it totally rocked)

The Ingredient Binder

I have been trying for months to figure out a way to save money and get organized with my dinner meals. When I stumbled across this 30 meals plan (by littlenannygoat at http://littlenannygoat.blogspot.com/2009/05/what-heck-it-30-meal-plan.html), it was heaven. I have tried something sort of similiar, it was just not orgainized so it did not stick. I am loving dinner time now because I do not dread the question from my kids "What's for dinner?" All I do is look at my recipes on my fridge and choose. Here are the steps that I did to becoming uber organized for dinner. Oh, the really cool thing, January was "the" trial month, I jotted down 30 recipes and wrote down all the ingredients I needed for them, plus a few extras my total was right around $275 for the entire month. I only had to go to the grocery store for milk, eggs and cheese. I love this new plan. I am still in January and loving this plan because I can save or use that other money that I would be spending on gas or last minute groceries for other things, awesome huh! Here are the steps I did to making my dinner meals a dream come true.
Step 1
Find Recipes
Step 2
Type/write recipes on recipe cards (must LAMINATE, you will
thank me later,promise)
Step 3
Organize Ingredients THE MOST IMPORTANT STEP
Open excel and make some Spreadsheets
Examples for titles
Meat
Grains
Spices and baking needs
Fruit
Vegetables
Canned Goods
Condiments
Etc...
(some examples shown on Littlenannygoats blog)
Example

Meat ground beef ground sausage

Lasagna 3/4 lb 1/2 lb

Dairy Mozerella Cheddar cottage cheese

Lasagna 1 cup 1 cup 1 1/2 cup
**This example did not really turn out very well when seen on blog, contact me if any questions.**
There are many ways you can do this on Excel when making your spreadsheet.
1. is to "rotate text up"(button) for all your ingredients
2. is to number your meals on your spreadsheet. That way when you are on meal
30 you know what line you are on.
** This step may take awhile, but it is the most important. It lets you know what you have and what you need to make all your recipes for a care free month of planning.**
Step 4
Make Binder- Decorate it to how you like it, make it
fun/beautiful/whatever you like.
- in the binder you will have 1. ingredient list (made from
your spreadsheets) in page protectors
2. recipes too long for recipe cards
3. recipes you want to try but not
sure you want to add to your 30 meals
4. Dessert Recipes
**all of these recipes should be in page protectors to keep from
losing them. :) **
Step 5
Make Recipe Box for fridge.
http://littlenannygoat.blogspot.com/2009/05/refridgerator-box-tutorial.html
Here is where I recieved my instructions on how to make the box. I love it
because all I have to do is jet on over to the refridgerator and get out the
awesome recipes and cook away, with no worries, do I have all the ingredients.
Step 6
Enjoy Stress Free dinner meals!

Sunday, January 24, 2010

Butterflies Inc. FELT PLAYHOUSE


Here is picture A of the garden, that you can pick your veges and fruit from.

Here is the front door, I am going to make the side of the door have hinges and hide some velcro under the scalloped edge to hold the door up(will post more pics)
I am showing you how to pin the special details to the house.


Instructions:
1. Measure your table top length and width + 1 inch to everyside
- for instance the length of my table is 62" so I added 2" on of the end so that I would be able to sew it to the sides of the house.
2. Measure the height from the floor to the table top.
3. after you have cut out all 4 sides and top(aka roof) you will proceed to cut out shapes for: door
windows 4 pieces of white 1 1/2" width about 14" tall
window flower box ~15"W x 4" H you can add an angle at the ends(optional)
flowers all sorts of colors felt- pipe cleaners to help stand up.
***will show tutorial for flower next post********
animals- owl,dog, cat, squirrel, bird,lizard......
Garden- dirt, tree, apples, leaves, carrots, lettuce, pumpkins, corn,etc.
Laundry- basket, lines
Mail box
Dog house, dog bowl, bone

***** WHEN PLACING DETAILS TO HOUSE LEAVE ROOM TO HEM THE BOTTOM OF HOUSE******
It is so much fun to be creative and see what you can come up with. I made it so it would be more like a quiet book, so most of the animals and food, mail box with letters and all can be taken off and easily put back on. You can sew on the felt or you can use Fabri-Tac, which is what I used and it seems to be working great!

Then the fun part begins and you piece it all together as in the last photo(above) Just lay everything on top of your "house" cut out pieces. You DO NOT want to cut anything out such as the DOOR, or the DOG HOUSE DOOR or the WINDOWS until you have put it all together and and have it on your table you may not like where you put it. Plus the extra layer helps it to be sturdy and strong.

1.When you start to sew the house together (after you have sewn all the details on all 4 sides and even the roof you you want) you want to start with one long side and the top "roof" of the house.
2. work your way around the house until you have all 4 sides sewn to the "roof" top piece.
3. place the unfinished house ontop of your table. making sure all widths, heights, and lengths are perfect. If you come across that your house is too long and bends at the bottom, that is ok, cut off from the top, sew it back on to the same spot and make a scallopped edge with the extra that you left on. LEAVE ROOM ON BOTTOM TO HEM** SEE PICTURES TO NOTICE THE SCALLOPED OVERHANGE ON TOP OF HOUSE. IT WILL BE RED.***
4. Now that all is measuring perfectly, return to your sewing machine and start to sew the sides of the house together, to enclose the house.
5. HEM the bottom of the house. Very important, it will help the house not stretch too much once five millions toddlers and older kids think that it is too cool and all jam pack themselves in.
6. Cut the doors, windows, etc..
7. glue on velcro, or sew
8. sew on netting for window screen (optional)
** I highly recommend this step because the love to stick there adorable heads through the holes of the windows. So, in order to stop getting there heads stuck or ripping of said felt window to shreds after you worked so hard, I would advise the netting(screen) for the window.
9. LET THEIR IMAGINATIONS GO WILD.

Have fun sewing!!
Oh, p.s. here is the site where I got my inspiration from thanks Jill, my kids love it.
http://homemadebyjill.blogspot.com/2009/10/felt-playhouse.html

Tuesday, January 19, 2010

ORGANIZATION....DVD CHAOS!! Help!

This is my finished project. Most of my dvds fit in these DVD folders, although it is not to stylish now, it will be hidden in a drawer,unitl I can find a more appealing to the eye DVD foler. Anywho, I am needing to go back and get two more of these DVD Folders. They are awesome, I had a huge mess (scroll down and see for yourself)
This is the one of the massive piles of dvds I have/had to sort through to make into the above picture and as you can see there is a little helping hand that was helping me open and pull the dvds out of there cases.

And this picture here is the "Helping Box Baby" she was ever so kind enough to repeatedly knock over the DVD piles, oh, thank you !
Then there was the talk with the two older ones to keep the organization. I think that it will work, it is alot easier than opening and closing cases. This is going to rock, and now there is not going to be cases strung all over. Yeah!


Say What?


BE HAPPY

I taught a class for the Young Women at my church on Sunday (http://www.lds.org/) it was about optimism. Well, anywho it was really fun, I love my girls they are so easy going and have lots of energy. Anyway, I tried something new, we role played a story instead of reading it, that was a success. And I made them all these cute necklaces that said "Be Happy" on them. It was a great lesson for me too, I love how when you teach you get so much out of the lesson for instance...
In the lesson there is a scripture I thought was pretty awesome. It is as follows:

Search diligently, pray always, and be believing, and all things shall work together for your good, if ye walk uprightly and remember the covenant wherewith ye have covenanted one with another. Doctorine and Covenants 90:24
p.s. that was the best picture I could get, the flash was to bright and the non flash well, you see. But by the fiftieth picture Jayde was done. LOL

Today I think I might finally read on how to use my camera, instead of ..... point, click......(not going to confess how long I have had the camera...) My pics will get better. Even though you all know I am an expert on taking pictures and I can only get better.hehe.


Have a great day!


Butterflies Inc. Vintage Skirt

***UPDATE***
I found the most adorable lace and velvet (pink) ribbon. I am so excited. I am hoping to put it all together this week.

I am making this adorable skirt so pray that it will turn out. I have no pattern for it except for the one I made. I will take pics once I get to lay it all out for you too see all the fabric. It is a vintage skirt made with black chiffon material. Let's just say it will be amazing.

Monday, January 18, 2010

Hello Everyone!!

This blog is for everyone that wants to: not only say something to take a load off, but to also, learn some cool new tricks. Such as: Sewing something too cute and you can do it!!/ Organize ( yes you too can be organized) and last but not least a tab for my etsy store.

Also, I know I am 5 years to late on the blog thing but I have been so intoxicated with everyone elses blogs that I thought I had nothing to share. But I do so there. Have fun reading and getting something new